Wednesday, September 1, 2010

Not a Cupcake: Iron Skillet Banana Bread.


Kitty here with a bit of a solo project! Sara was on vacation with the rest of the family this past week, and so I cleaned the entire kitchen as a nice gesture for our momma. In the course of cleaning, I found three heavily spotted, extremely ripe bananas. Well, being that I am a freak who likes her bananas still mostly green, I knew I wasn’t going to eat them. Obvious answer: Banana bread!

Of course, as soon as one has an idea, one finds the pantry lacking, so I needed to find the most simple banana bread recipe and even then I had to modify it. I used this set of ingredients from Food.com and substituted everything I didn’t actually have.

I really love this recipe even though it was completely devoid of any spices or flavorings. It was hearty without being dense, moist and buttery and had a yummy, strong banana flavor. The only thing I would do different is add walnuts but my brother hates them, so I left them out this time.


RECIPE
((You can, of course substitute your favorite recipe of choice. This was just what I could manage with the pantry contents.))
·       1/2 cup salted butter
·       3/4-1 cup light brown sugar
·       2 eggs
·       1 teaspoon baking soda.
·       2 cups flour ((in my case I used 1 cup of standard flour and one cup+2 tablespoons of cake flour because I ran out of regular flour. I would advise doing this, it made it so yummy and fluffy!))
·       3 ripe bananas


OVEN TEMP:  300 degrees. Rack in the middle of the oven.
1)   Grease and flour your skillet.  ((I used “Pam for Baking” cooking spray.))
2)   Mush up the bananas until they’re as smooth as you can get them.
3)   Combine banana mash with brown sugar, softened butter and both kinds of flour until there are no more dry spots and everything looks so smooth.
4)   Pour into the skillet and place in the oven. Bake for 45-55 minutes or until toothpick inserted in the center comes out clean. The edges should pull away from the skillet slightly.
5)   Either wait for it to cool and pop it out of the skillet or cut into wedges.
MAKES:  8 really thick slices*
*I used a 12” skillet. Halve everything for a 9” skillet.
SERVING SUGGESTION:  Cut in half and slather with peanut butter. I personally enjoyed mine with a cup of dark hot chocolate.


In conclusion: I never want to cook anything not cooked in an iron skillet ever. 

-Kitty 

P.S. As usual, the photos are by me

After the Rain, There Are Rainbows

So to kick off our baking blog we made…
something that involved absolutely no baking at all.

Sara found these charming no-bake petit-fours on I Am Baker. Of course, since a Valentine’s Day theme was not situationally appropriate and Kitty likes to paint, we decided to go with whatever struck our fancy. Rainbows won out, mostly because Kitty was involved. 


It was also kind of a drab day. Pardon the bluish tint to the photos.


The first thing we did was make royal icing and marshmallow fondant. Kitty made the royal icing, Sara made the fondant.

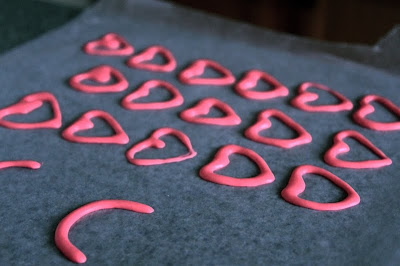
Does anyone know if humidity can affect royal icing? Ours never really hardened despite ample icing sugar and almond extract. In the end, the cute little decorations (hearts and rainbows) got scrapped. Oh well L, learning experience.

Sara finished the fondant without incident, and wrapped the Cakesters.


We wrapped the chocolate cakesters in blue fondant that Kitty made (and consequently had Smurf hands for a good half hour).

LUNCH BREAK~


This involved cleaning up and leftovers from the previous night. These were made by our Momma. Recipe is here.  We would recommend them highly, as we could eat them for days. Don't they look yummy garnished with fresh tomatoes and avacados? 

Anyway, back to work!


Sara proved more efficient and skilled at fondant wrapping than Kitty, so she did the vanilla cakesters as well in the plain white fondant, which was then turned over to Kitty.


Kitty then painted the white petit-fours with wide rainbow stripes. She had trouble with the paint ‘sweating’ and bleeding onto the other petit-fours are stacked. Is it temperature or alcohol-to-gel color concentration that does this? It made a terrible mess.

Since the independently piped decorations didn’t pan out, Sara decided to pipe the same shapes directly onto the petit-fours as it seemed a waste of icing otherwise.


And viola! They are done!

Over all, this seems like a fun recipe for a no-bake treat and the fondant and icing are very easy. An attentive novice cook could easily replicate it. Due to the sweetness of the end result, we recommend it for children’s parties. Older children could even paint their own wrappers!


-       Kitty and Sara [Two Moore Cupcakes]
 

PS. The photos are by Kitty as is the adorable apron Sara is wearing. 
O